Preparation of pictures of
ceramic beer bottle caps
Instead of a digital camera I
use a computer scanner for the preparation of pictures. A scanner has
the advantages that the printed surface of the ceramic caps always is
in the focus of the scanner and there are less reflections on the
surface of the ceramic caps. Furthermore the caramic caps easily can be
placed in large numbers onto the glass plate of the scanner. Taking
pictures with a digital camera requires to place the ceramic caps
either in some kind of support or to put them carefully by hand on a
flat surface, standing at the small back tip of the ceramic caps.
If you do not have access to a scanner you can use a normal copy machine in a copy shop to generate pictures of your ceramic caps. In this case please place transparent cling film onto the glass plate ot the copy machine, avoiding any air bubbles between the foil and the glass. Than place the ceramic caps with their printed side facing to the glass plate onto the glass plate and start a copy which is just scanned but not printed. However you should ask the personel of the copy shop, if they agree you to use their copy machine this way. The cling film should avoid any scratches to the glass plate of the copy machine.
Below you see a few pictures, displaying how I prepare pictures of ceramic caps using a computer scanner:
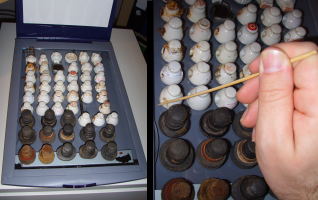
The ceramic caps are placed
onto the glass plate of the scanner with the printed side of the
ceramic caps facing to the glass plate. I usuallly position all ceramic
caps exactly onto the glass plate. This way later on I do not have to
individually rotate the pictures to have the wirting on the ceramic
caps easily readable. Adjusting the ceramic caps can be done with a
wooden tooth pick or something similar. Using a such a tool avoinds
scratches on the glass plate of the scanner.
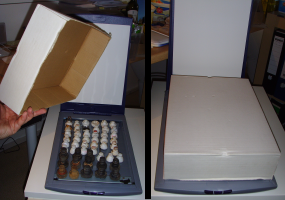
The ceramic bottle caps are
covered with a cardbord box. This way the background of the scanned
picture gets black and the colors of the ceramic caps, as well as their
shape is well preserved on the scanned image.
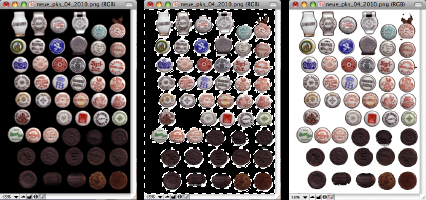
After scanning I modify the
scanned image as follows: I selects the background of the image and
adjust the brightness to minimum and the contrast to maximum. This the
picture gets a homogeneous black background. The background color
easily can be changed for example to white, by selection of the
background with the selection tool of a graphic program and by
replacing it with another color.
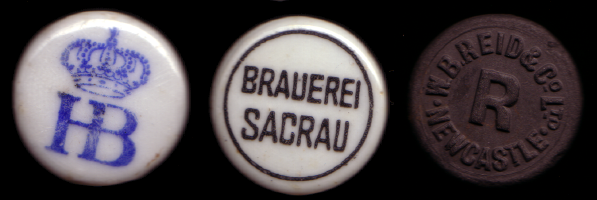
In order to get pictures of individual ceramic caps I open an empty picture file of the disired final size of a picture of a single ceramic cap, select a single ceramic cap from the scanned picture using the copy tool of the graphic program and paste this piece of the sanned picture into the empty picture file. Next the ceramic bottle cap is exactly centered within the picture and the picture is saved. Using this method it is even possible to get good quality picture of British ebonite screw caps, which have a dark grey color without any prints but only with embossed writing and logos on top of them. An example is shown at the right hand side in the figure above.
Original data files of pictures in general I store in the png-format, as png-files can ge stored lossless, whereas for example jpg-files are compressed and suffer quality loss with each saving step. So if I later on manipulate png-files by, for example inserting a logo etc. the quality of the picture does not deteriorate with each saving step between different manipulation steps.